Aliexpress purchasing link as below:
https://www.aliexpress.com/store/product/Free-Shipping-Hot-Sale-SPAD-meter-for-chlorophyll-measurement/904631_32972467936.html?spm=2114.12010608.0.0.5feb5085szsDFt
Part I. Summary.
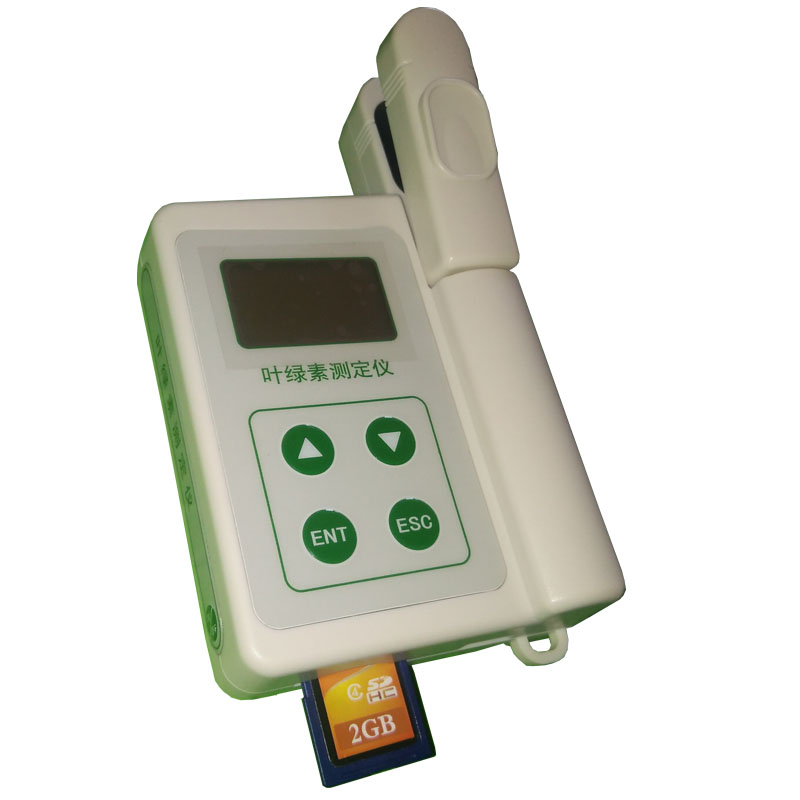
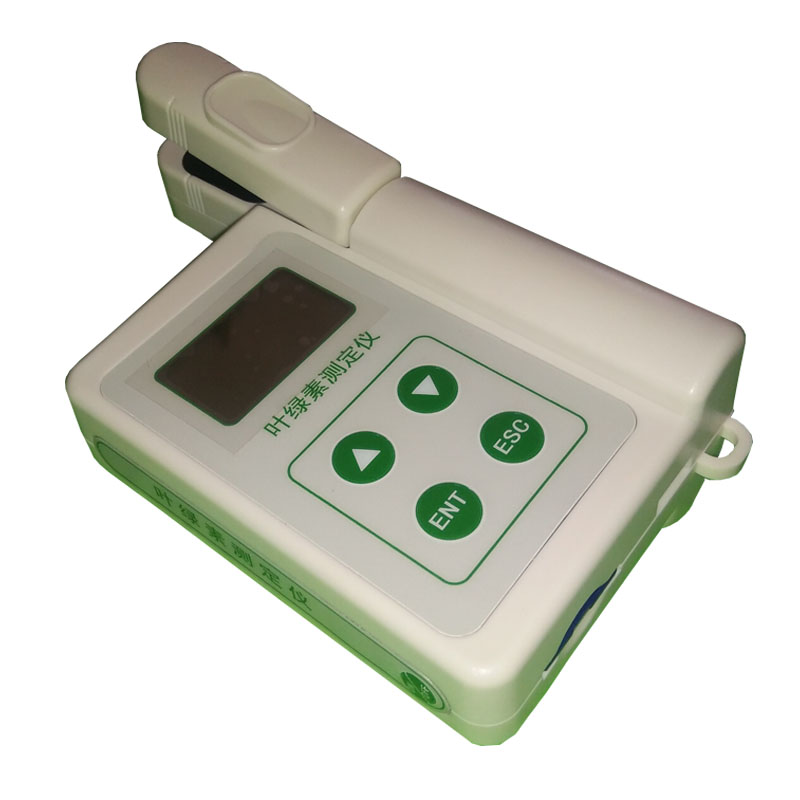
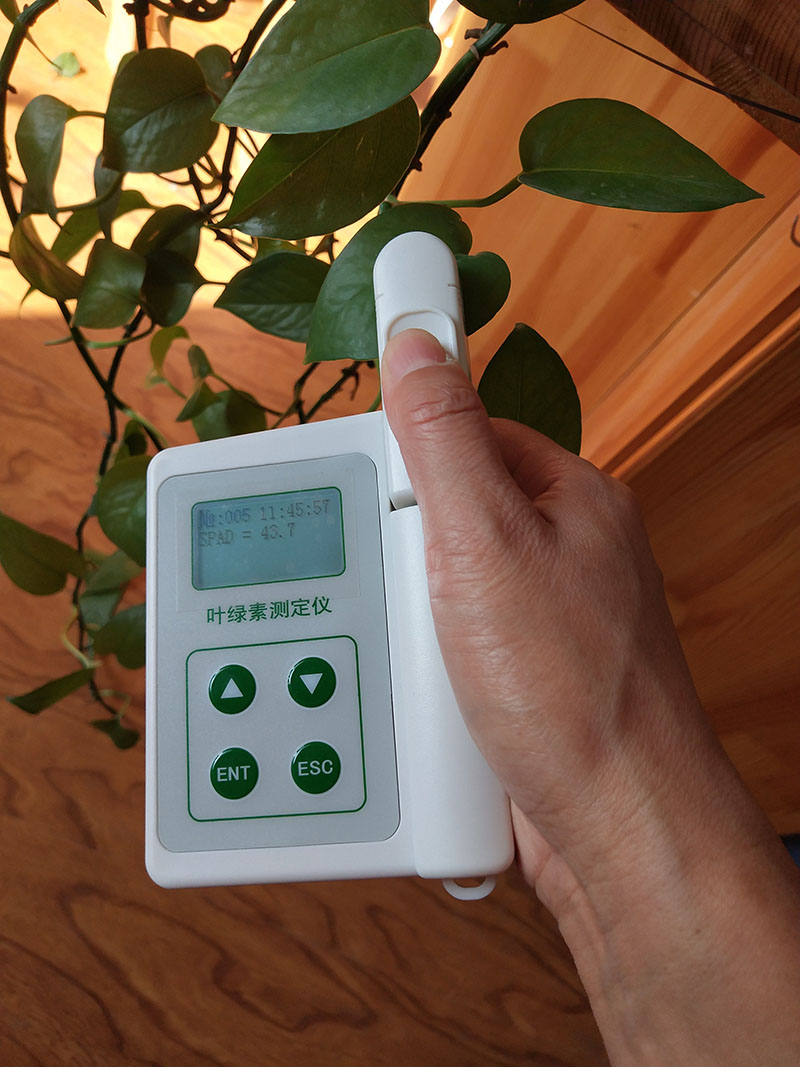
The plant chlorophyll meter can instantly measure the relative chlorophyll content (in SPAD) or “greenness” of the plant, so that we can understand the true nitro requirements of the plant and help us understand the lack of soil nitro or whether nitrogen fertilizer is excessively applied. The meter can help us to improve the utilization of nitrogen fertilizer and protect the environment (preventing the application of excessive nitrogen fertilizer to contaminate the environment, especially the water source).
Part II. Working Principle.
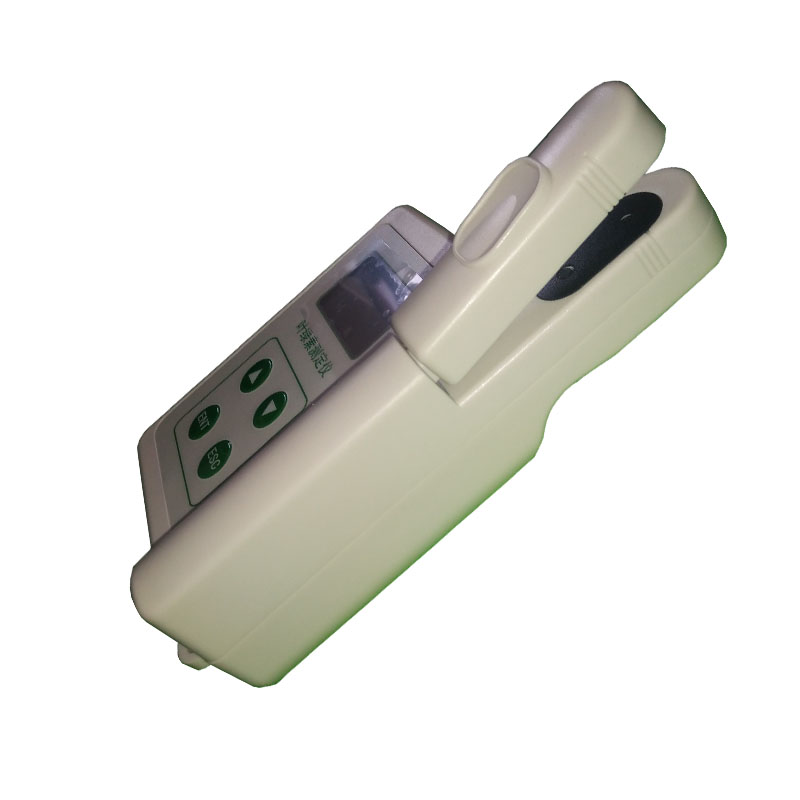
Two LED light sources emit two kinds of light. One is red light (peak wavelength 650nm). The other is infrared light (940nm). Two kinds of light penetrate the leaf, hit the receiver. The light signal is converted into analog signal. The analog signal is amplified by an amplifier and converted into a digital signal by an analog/digital converter. The digital signal is processed by the microprocessor to calculate the SPAD value and display it on the LCD screen.
Calibration and calculation of chlorophyll meter measurements.
1)During the calibration process, the indenter does not sandwich the sample, the two LEDs are illuminated in sequence, and the received light is converted into an electrical signal, and the ratio of light intensities is used for calculation.
2)After the sample is clamped by the indenter, the two LEDs illuminate again, and the light transmitted through the leaf hits the receiver and is converted into an electrical signal, and the intensity ratio of the transmitted light is calculated.
3)The values of steps 1) and 2) are used to calculate the SPAD measurement, which is the current chlorophyll relative content of the clamped sample leaves.
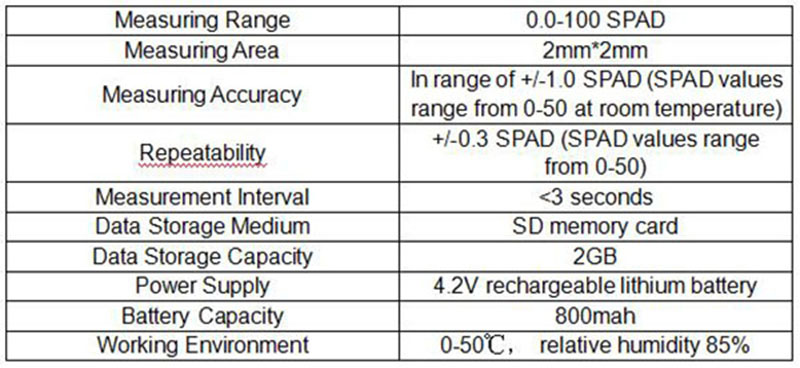
Part III. Main Specifications.
Part IV. Instructions.
1)Turn on the power.
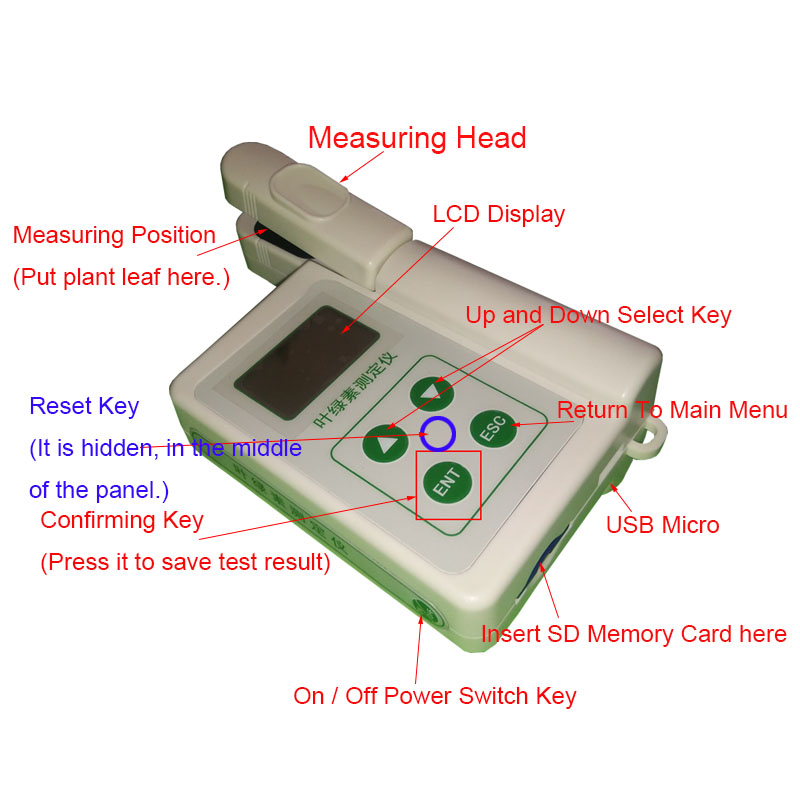
Press the ON / OFF power switch key on the side of the instrument, and the display will enter the main menu (Figure 1).
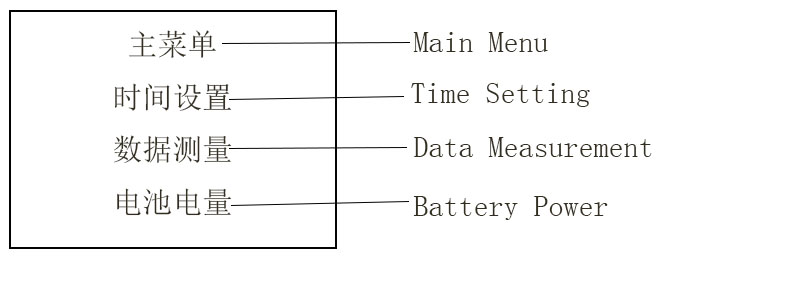
(Figure 1.)
2)Calibration.
Press and hold the measuring head to calibrate (no object is allowed at the measuring position), the LCD display will automatically enter the data measurement interface (do not release the measuring head until the screen is displayed by SPAD=—- changing to SPAD=00.0, which indicates that the calibration is finished and the measuring head can be released.
No:001 will appear in the upper left corner of the LCD screen during calibration, which indicates that the SD card has been detected by the instrument and the data can be stored now.
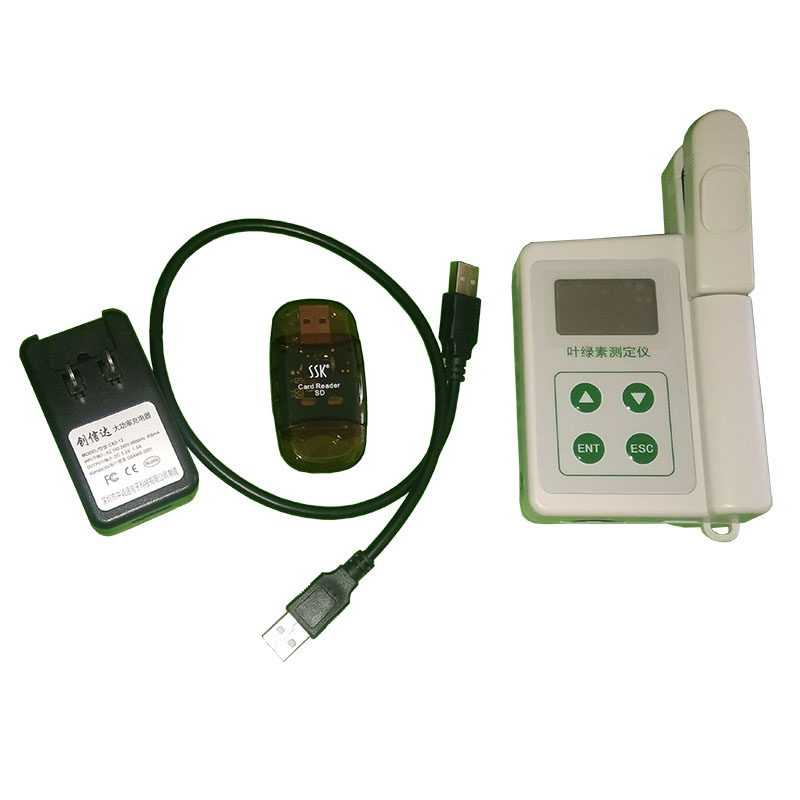
If No:– appears, it indicates the SD card is not detected, please check if the SD card is inserted properly. See Figure 2)

(Figure 2.)
3)Measuring.
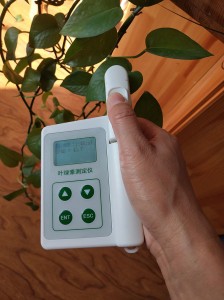
Measurements can only be made after calibration is complete. After the calibration is completed, place the plant leaf in the measuring position and press the measuring head for 3-5 seconds. The display will automatically show the chlorophyll value of the measured leaf. Press the confirming key (ENT) to save the test result in the SD card. The serial number is automatically increased by one. If you do not need to save the test results, you can press the measurement head directly to make the next measurement.
(Figure 3)
4)Time Setting.
After the power is turned on, the cursor automatically stays in the time setting bar. Press the ENT key to enter the time setting interface. You can select and set the date and time by pressing the Up And Down Select Key and the ENT key. After the time and date are set, press the ESC key to return to the main menu (Figure 4 and Figure 5).

Figure 4) (Figure 5)
5)Battery Fuel Gauge.
In the main menu interface, move the cursor to the battery power bar and press the ENT key to enter the battery power detection interface. On this interface, you can observe the battery voltage of the instrument to determine whether the power of the instrument is normal. If the voltage is lower than 3.8V, please charge it in time. After observing the battery voltage, press the ESC key to exit the battery voltage interface. (Figure 6)

(Figure 6)
Part V. Matters Needing Attention.
1) After starting the machine, you need to press the measuring head to calibrate it, then enter the data measurement interface.
2) There should be no obstructions under the measuring head during calibration, otherwise it will not be properly calibrated.
3) After exiting from the time setting or battery power interface by pressing the ESC key, you need to press the measuring head to recalibrate before entering the data measurement interface.
4) SPAD will be converted to SPAD=—- when the measuring head is pressed every time. Do not loosen the measuring head until the test result is obtained and the leaf temperature T is stable. Press the ENT key to save the result. Open the measuring head, this process takes about 3-5 seconds.
5) Please do not insert or remove the SD card when the instrument is turned on. When the instrument is not inserted into the SD card, the No. position is displayed No—–.
6) When the instrument is not used for a long time, please charge it every 60 days.
Part VI. Matters Needing Attention.
1)If the instrument does not pass calibration normally every time please clean the measurement position first to see if there is any object blocking the photoelectric sensor window.
If there is no object blocking the photoelectric sensor window, please charge the instrument for about 1 hour then try again to see if this problem is caused by insufficient battery power.
If there is no way to solve this problem, please contact our customer service in time, we will assist you to solve the problem.
2)If the calibration passes normally, but each measurement result is highly variable, please check if the battery power is normal.
If there is no problem with the battery power, please turn off the power for 5 minutes, then turn it back on and calibrate it newly then measure again.
3) If the instrument crashes, press the reset key (the reset button is hidden, hidden in the middle of the four buttons on the main panel of the instrument) to shut down, and then restart to resume normal operation.
Pictures In Details.
If you are interested in this product, or you have any questions to it, please do not hesitate to contact us by telephone, WhatsaAPP, WeChat,
Facebook messange, TM of aliexpress etc.

-
Flange rotary marking machine for metal parts
-
Professional edge polishing machine for acrylic...
-
Best automotive BT-PH500 hydrogen generator fue...
-
BT-1290L 1200x900mm CO2 Laser engraving and cut...
-
Unlimited working length diamond edge acrylic p...
-

Hot Selling acrylic bending machine acrylic hea...
